
In this tutorial, you will learn about creating 3D text effects using Photoshop Tutorial.
Step 1: Create a New Document
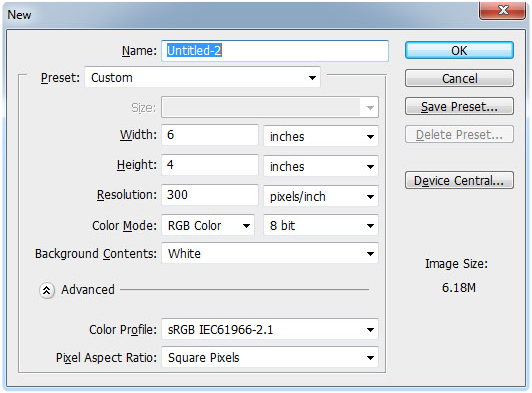
To create a new Photoshop document, go up to the File and choose New. You will get the New Document dialog box pop-up. Enter the size you need. For this tutorial, In the below image a Width of 6 inches, a Height of 4 inches, and a Resolution of 300 pixels/inch are shown. It is a standard resolution for professional-quality printing. Setting Background to White sets the background color of the new document to white.
Step 2: Select The Type Tool From Photoshop’s Tools Palette
To add text to the document, use Photoshop’s Type Tool. You can select it from the Tools palette.
Step 3: Choose A Font From The Options Bar
Next, we need to choose a font. If the Type Tool is selected, the Options Bar at the top of the screen will change to show the options related to the Type Tool. The 3D effect is more prominent with the fonts that have big and thick letters. Impact is a good font for this. You can also choose size of the text. It can be changed later.
Step 4: Choose A Color For The Text
To choose the color for the text, look to the right in the Options Bar and you will find a color swatch. It shows the current text color and the option to change that. After clicking on this, it will open Photoshop’s Color Picker.
Step 5: Add Your Text To The Document
After selecting the font and text color, you need to add the text. To do that, click inside the document and it will give you the option to input text. In this example, we used the text, “TUTORIAL”.
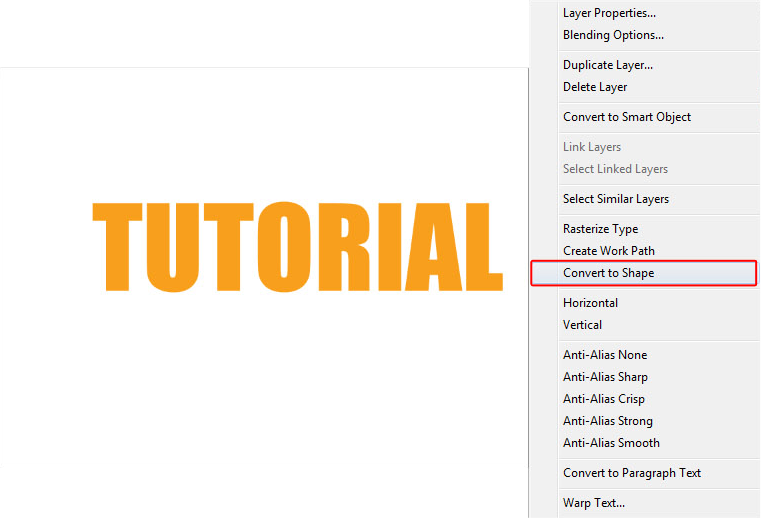
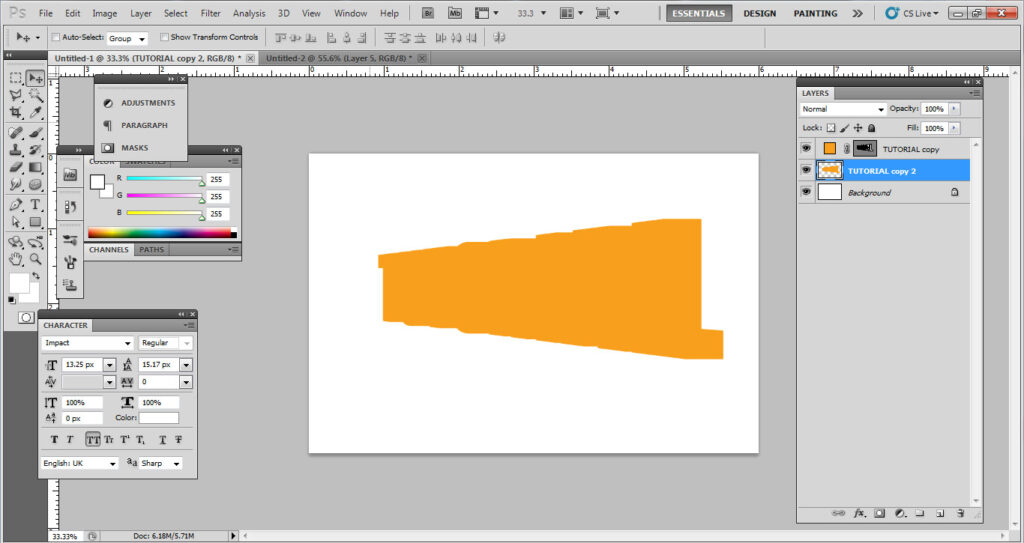
Step 6: Convert The Text To A Shape
To create the 3D effect, you need to convert the text layer into a shape layer. After converting the text to a shape, you can change the perspective and create the effect.
Select the text layer and go up to the Layer menu at the top, choose Type, and then Convert to Shape:
If you look at the Layers palette now, it will look completely different. This is because it got converted from the text layer to the shape layer. Now, you can apply the perspective transformation to it and create the 3D text effect.
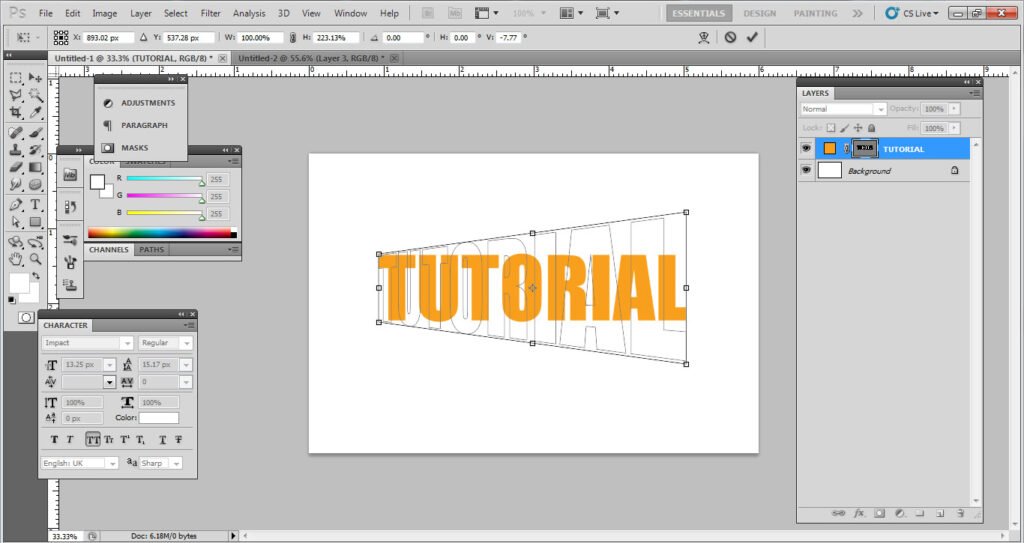
Step 7: Change The Perspective
From the Edit menu, choose Transform Path. In the secondary menu, you can see Distort and Perspective options. Select Perspective.
To change the perspective of the image and give it a 3D look, click on the handle in the bottom right and drag it down. The height of the side will keep increasing as you drag. The other side will reman unchanged.
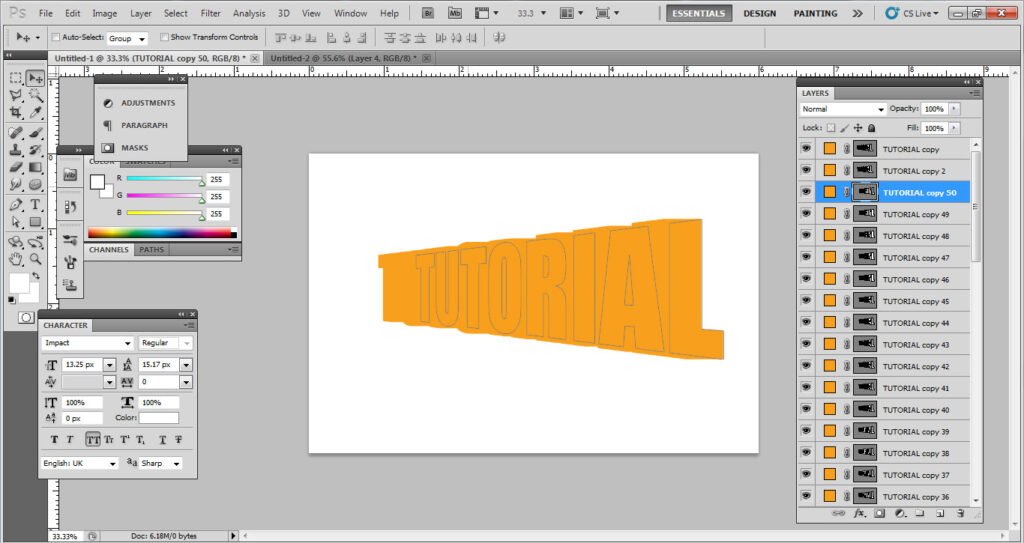
Step 8: Create Multiple Copies Of The Shape Layer
To give depth to the letters, you can create multiple copies of our shape layer. To start, select the Move Tool from the Tools palette. Make sure the Move Tool and shape layer is selected, and hold down Alt (Win) / Option (Mac) key and press the right arrow key on the keyboard. Press it repeatedly. Each time you press it, with the Alt / Option key held down, it will create a new copy of the shape layer. It gives depth to the letters. You can adjust it as per the depth you want.
Step 9: Move The Original Shape Layer To The Top Of The Layer Stack In The Layers Palette
Before going ahead, you need to move the original layer to the top of the pile.
Step 10: Merge All The Copies Together
Now, all the copies of the shape layers need to be merged keeping the original layer at the top. To do this, click on the layer directly below the original layer in the Layers. Use the scroll bar on the right to scroll down to the layer directly above the Background layer. Hold down the Shift key on the keyboard and then click on the layer to select it. If you just click on it, then it will deselect the layer. You need to select both layers at the same time, along with every layer in between them.
With all of the copied layers selected, go up to the Layer menu at the top of the screen and choose Merge Layers down near the bottom of the list.
Step 11: Add A Black-To-White Gradient To The Merged Layer
To give the letters a truly 3D appearance, add a simple lighting effect. You can also add something else that looks like a lighting effect. Click on the merged layer in the Layers palette to select it if it’s not selected. Then click on the Layer Styles icon at the bottom of the Layers palette. A list of all the available layer styles will appear. Click on Gradient Overlay to select it:
Gradient Picker, showing us all the available gradients we can choose from. The one we want is the Black, White gradient. Click on it to select it, then click OK in the top right corner to accept it:
Back in the main Gradient Overlay options, you’ll see the gradient preview area now showing the black to white gradient (if it wasn’t already). Below that, there will be a couple of important options. Make sure the Style option is set to Linear and the gradient Angle is set to 90°:
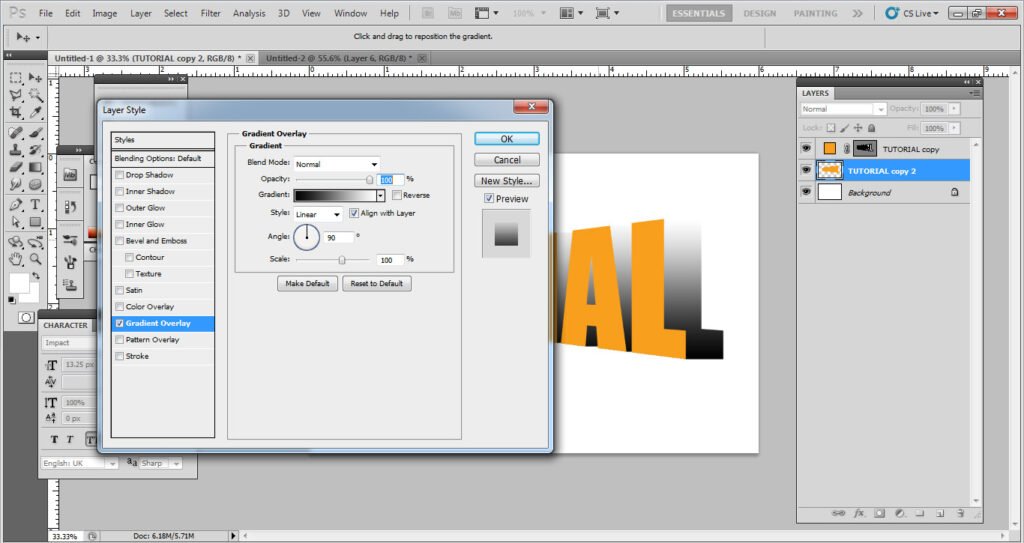
Click OK when you’re done to exit out of the Layer Style dialog box, and we’re done! Photoshop applies the black to white gradient to the merged layer, creating a shadow effect on the letters and completing our simple 3D text effect:
You may also like to read: